API Security with ASP.NET Core 5.0 and Azure AD for Dummies
This blog is part of a complete blog series.
- Part 1: Authentication vs authorization
- Part 2: The different actors
- Part 3: Authentication with Azure AD
- Part 4: Authorization with Access Control List
- Part 5: Authorization with Application Roles
- Part 6: Authorization with Delegated Permissions
- Part 7: Retrieve more user information (this blog)
- Part 8: Access APIs on behalf of a user (coming soon)
- Part 9: Automate the Azure AD configuration (coming soon)
In many scenarios, you want to have more information about the user (or client application), compared to what is available in the access token. Let’s explore two ways to achieve this!
Token configuration
This is the easiest way to get extra information about the user. In Azure AD, you can configure optional claims to be added to the tokens that are generated for your API. Once configured, Azure AD ensures that all tokens include these additional claims, so your API just has to extract them from the incoming access token. Read here how you can achieve this.
Configure optional tokens
- Navigate to the party-api App Registration
- In the Token configuration tab, click on `+ Add optional claim`
- Choose `Access` as the Token Type
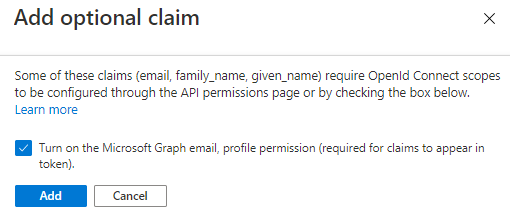
- Select these popular optional claims and click Add:
- ctry: the user’s country
- email: the addressable email for this user, if the user has one
- family_name: provides the last name of the user
- given_name: provides the first name of the user

- Check the Turn on the Microsoft Graph email, profile permission checkbox and click Add

- In the API Permissions tab, you see that the email and profile permission has been added

Inspect access tokens
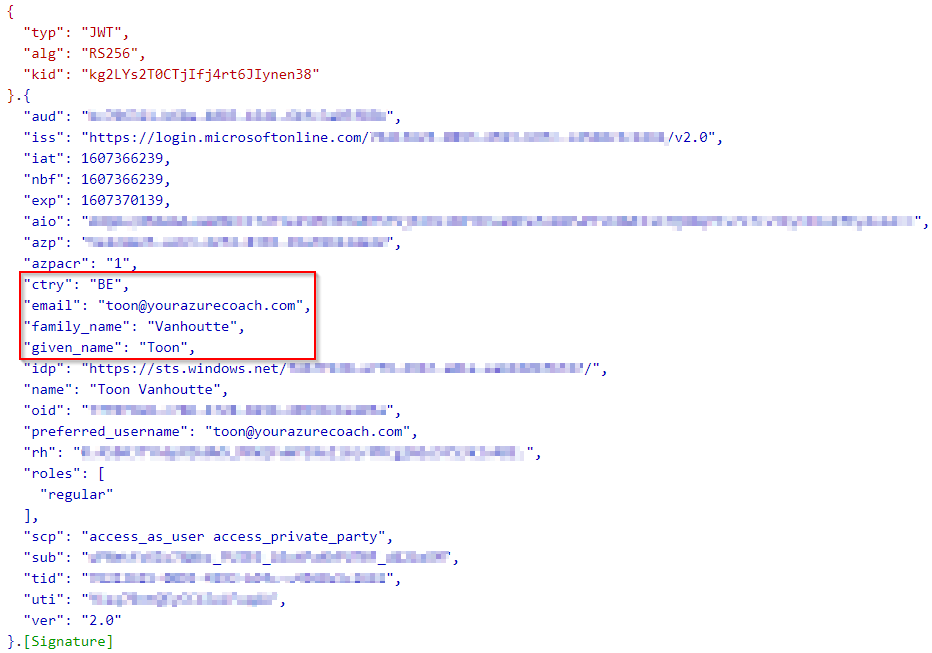
Let’s have a look at the resulting access token.
- Open the Postman configuration for the User App, as described in Part 3.
- Click on Get New Access Token and log in (if needed)
- Inspect the access token on jwt.ms
- See that the email and country claims have been added

Be aware that there is another way to extend Azure AD tokens, via PowerShell. At the time of writing this feature is still in preview, but supports more optional claims than via the Azure portal.
Call Microsoft Graph
While the Token configuration is the simplest option, the extra information that is available is rather limited. In case you need more information, you have to call the Microsoft Graph API. This requires some extra security configuration in Azure AD and needs some additional coding to get the job done.
Azure AD Configuration
Our API needs to authenticate against Microsoft Graph. That’s why we need to create a client secret.
- Navigate to the party-api App Registration
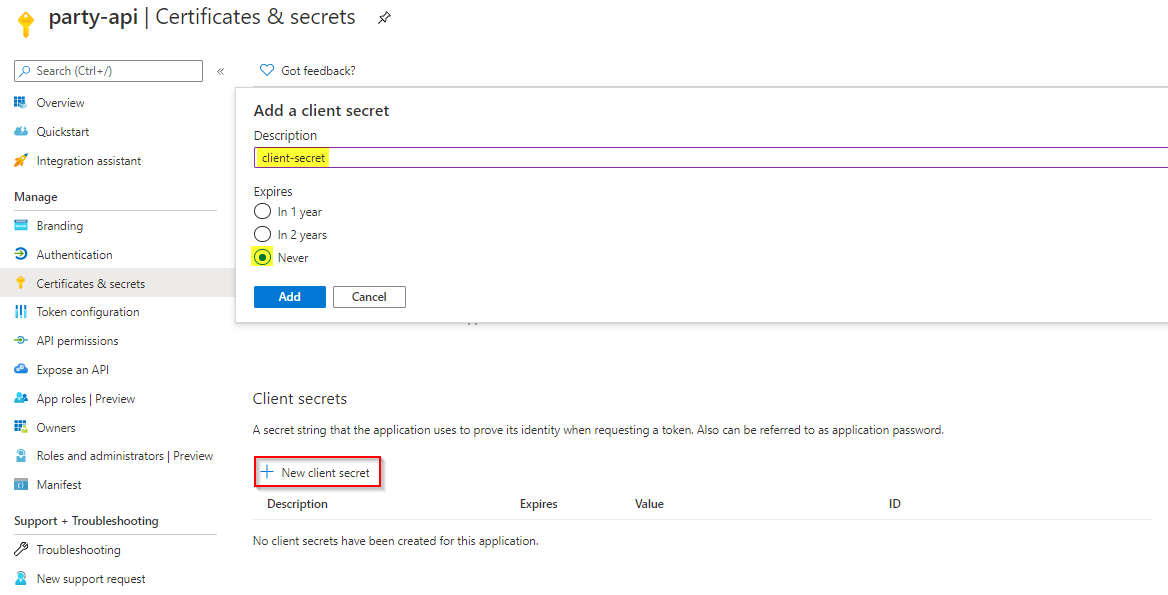
- In the Certificates and secrets tab, click on `+ New client secret`
- Specify a new and desired expiration and click on Add

- Copy the value of the client secret, you will need it later on.
It is important to treat the client id and secret as real credentials. More information can be found in this blog post.
- In the API Permissions tab, an Azure AD Administrator must grant admin consent for the User.Read Microsoft Graph permission.

Call Microsoft Graph from the API
- Open the PartyApi solution from the `02-with-authentication` folder
- Update the appsettings.json by adding the ClientSecret to the “AzureAd” configuration section:
 "AzureAd": {
    "Instance": "https://login.microsoftonline.com/",
    "TenantId": "<AZURE-AD-TENANT-ID>",
    "ClientId": "<PARTY-API-CLIENT-ID>",
    "ClientSecret": "<PARTY-API-CLIENT-SECRET>"
  },
- Add the Nuget package Microsoft.Identity.Web.MicrosoftGraph

- Update the Startup.cs file, by changing this statement on top of the ConfigureServices() method
services.AddAuthentication(JwtBearerDefaults.AuthenticationScheme)
   .AddMicrosoftIdentityWebApi(Configuration, "AzureAd")
   .EnableTokenAcquisitionToCallDownstreamApi()
   .AddMicrosoftGraph()
   .AddInMemoryTokenCaches();
- Update the PartyController.cs file, by changing the constructor
private readonly ILogger<PartyController> _logger;
private readonly GraphServiceClient _graphServiceClient;
public PartyController(ILogger<PartyController> logger, GraphServiceClient graphServiceClient)
{
   _logger = logger;
   _graphServiceClient = graphServiceClient;
}
- Update the GetIntoTheBar() method to retrieve and return additional user information
public async Task<PartyExperience> GetIntoTheBar()
{
   User user = await _graphServiceClient.Me.Request().Select(u => new { u.City, u.JobTitle }).GetAsync();

   return new PartyExperience
   {
      Date = DateTime.Now,
      Location = "bar",
      Status = PartyStatuses[new Random().Next(PartyStatuses.Length)],
      AdditionalInfo = $"City: {user.City} | Job: {user.JobTitle}"
   };
}
Test
- Call the party/bar operation with a valid access token
- The user information should be returned (if configured on your Azure AD user):

Conclusion
ASP.NET has a pretty simple way to integrate with Microsoft Graph. Behind the scenes, this uses the On-Behalf-Of flow, that will be detailed out in the next part of this blog series.


